Electrical
How to Replace an Outlet or Light Switch Safely (Like-for-Like)
How a beginner can safely replace a worn outlet or light switch like-for-like: turning off and testing power, wiring basics, and when you must call a licensed electrician.
- Difficulty
- Intermediate
- Time
- 20–40 minutes
- Cost
- Very low
A cracked outlet, a loose receptacle that won't hold plugs, or an old toggle switch you want to swap for a modern rocker are common small jobs. The rules are strict: same type, same place, same circuit. Anything more — new outlets, moved switches, new circuits, dimmers on unsuitable fixtures — belongs to an electrician.
Tools
- Non-contact voltage tester (and ideally a plug-in outlet tester)
- Insulated screwdrivers
- Needle-nose pliers, wire stripper
- Replacement device with the same rating (e.g. 15A or 20A, as marked on the old device)
- Phone camera
Step-by-step
- Turn off the breaker for the circuit. Plug a lamp into the outlet (or flip the switch) to confirm it's off.
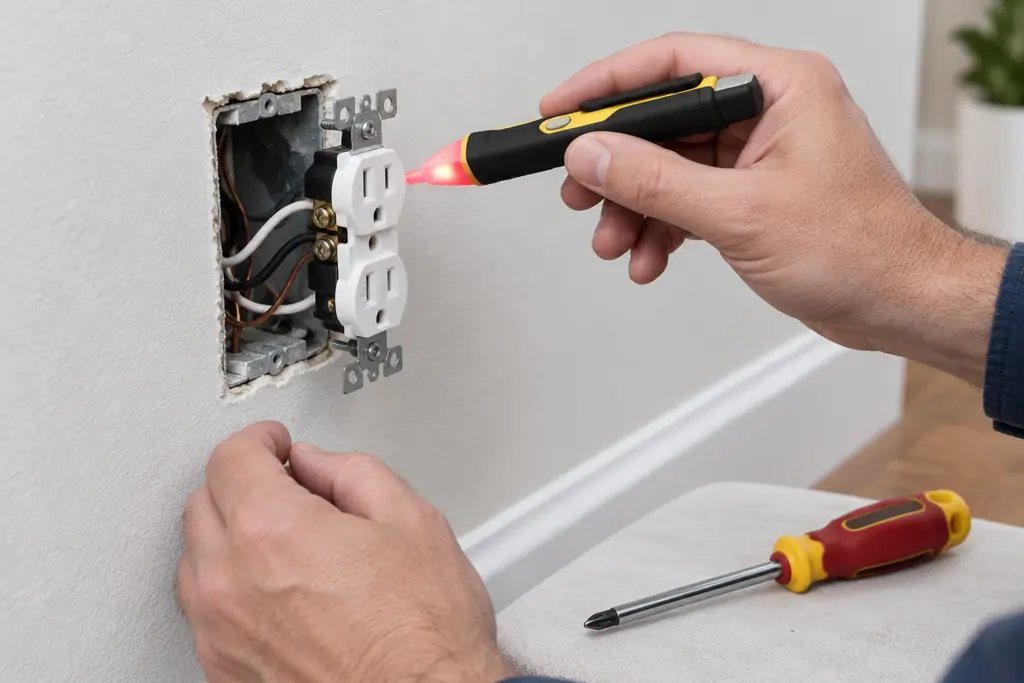
- Test with the voltage tester — first on a known live outlet to prove it works, then on the device you're replacing, including every wire once the device is pulled out. Boxes can contain wires from more than one circuit.
- Remove the cover plate and the screws holding the device. Gently pull it out.
- Photograph the wiring before disconnecting anything.
- Check the wiring condition. Stop if you see scorching, brittle insulation, aluminum (silver-colored) conductors, or connections you don't understand.
- Transfer wires one at a time to the same terminals on the new device. In typical North American wiring: black (hot) to brass screw, white (neutral) to silver screw, bare/green (ground) to the green screw. Other countries use different colors — follow the new device's instructions and your photo.
- Use the screw terminals with wires bent clockwise around the screw, rather than push-in "backstab" holes, which can loosen over time.
- Fold the wires neatly back into the box, screw the device in straight, attach the cover plate.
- Restore power and test with a plug-in outlet tester or by operating the switch.
GFCI/RCD outlets
GFCI outlets have LINE and LOAD terminals; wiring them the wrong way round means they may not protect downstream outlets. If you're replacing one, follow the instructions exactly and press TEST/RESET afterwards. If unsure, hire an electrician.
Call an electrician when…
- Outlets or switches are warm, buzz, spark or smell of burning.
- Breakers trip repeatedly.
- You want to add, move or upgrade outlets, circuits, or lighting.
- The home has aluminum branch wiring or very old ungrounded wiring.
- Anything in the box doesn't match what you expected.
Keep reading

How to paint a room like a pro
Prep, cut in, roll, repeat — the full method for crisp lines and no streaks.

How to skim coat a wall
Turn rough, patchy walls into smooth ones with thin coats of compound.

How to patch drywall (small to large holes)
Nail holes, doorknob dents and big holes — three methods and how to make them invisible.